
The moment of impact during a vehicle accident is often followed by a disorienting “fog.” Whether it was a significant highway incident or a minor parking lot mishap, the immediate aftermath involves a whirlwind of insurance adjusters, police reports, and the daunting task of finding a path back to normalcy. In 2026, navigating this process is more complex than it was even five years ago. Modern vehicles are essentially high-performance computers wrapped in sophisticated alloys and sensitive resins. A repair that looks perfect on the surface might still harbor digital errors or structural weaknesses that compromise your safety.
Professional restoration is no longer just about “banging out a dent.” it is a highly technical discipline that requires a marriage of traditional craftsmanship and advanced computer science. To return your vehicle to its factory-standard condition, you must understand the stages of the modern repair lifecycle. This guide is designed to act as your roadmap, helping you move from the initial shock of the accident to the final, satisfying moment you slide back into a driver’s seat that feels, smells, and performs like new. By focusing on technical accuracy and high-end finishing, you can transform a stressful setback into a long-term investment in your vehicle’s longevity.
Identifying a Facility with the Right Technical Credentials
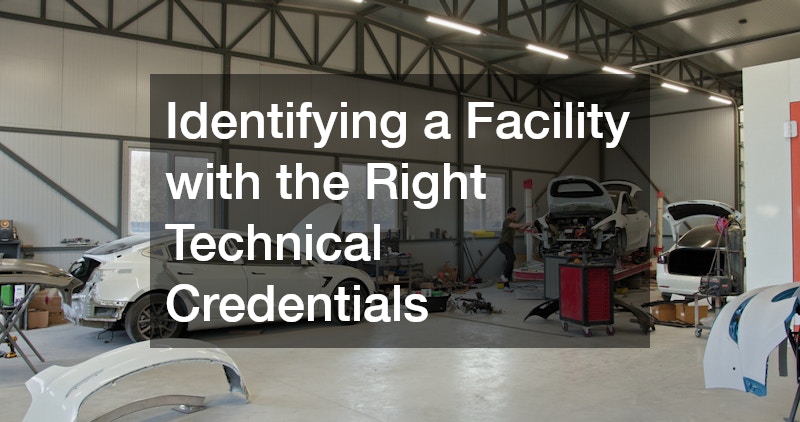
The first and most critical decision you will make is where to send your vehicle for its recovery. Not all repair centers are created equal, especially when dealing with the lightweight frames and complex sensor arrays of 2026 models. When researching local collision repair shops, your priority should be finding a facility that holds Original Equipment Manufacturer (OEM) certifications for your specific brand. These shops have invested in the exact computerized measuring systems and specialized welding equipment required by the people who actually built your car. A generalist shop might be closer to home, but they may lack the proprietary software needed to “handshake” new parts with your car’s central computer.
In the high-stakes environment of 2026 automotive restoration, transparency serves as the ultimate differentiator between a standard repair and a master-level reconstruction. Transparency is the hallmark of a high-quality auto body shop in the modern era, acting as a window into the technical precision required for today’s complex vehicles. You should look for a facility that offers a digital “blueprinting” process rather than a simple visual estimate, as a surface-level glance is no longer sufficient to account for the intricate network of sensors and high-strength steels. This involves a partial teardown of the damaged area to identify hidden structural issues that an insurance adjuster might miss from the curb, ensuring that every hairline fracture in a mounting bracket or compressed energy absorber is documented and included in the repair plan. By utilizing advanced 3D measuring systems during this blueprinting phase, technicians can compare your car’s current state against factory-perfect specifications to a fraction of a millimeter. A shop that uses photo-documentation and real-time text updates allows you to see the progress of your vehicle’s skeletal alignment and panel fitment, providing peace of mind that no shortcuts are being taken behind the scenes. This level of communication ensures that you are never left wondering about the status of your investment. It transforms the service from a mysterious “black box” operation into a collaborative effort where technical milestones, such as the successful recalibration of a radar unit or the perfect mating of a new quarter panel—are shared instantly. This evidentiary approach to repair not only builds trust but also provides a permanent digital record that substantiates the integrity and safety of the vehicle for years to come.
To ensure you are choosing a top-tier technical partner, look for these indicators:
- I-CAR Gold Class Status:
This is the highest level of training recognized in the industry, ensuring technicians are up-to-date on the latest materials. - Computerized Frame Alignment:
Modern cars use “crump zones” that must be measured to within a millimeter of factory specifications to ensure future airbag deployment is timed correctly. - Clean-Room Paint Booths:
Look for downdraft booths that use advanced filtration to prevent dust and contaminants from ruining a high-end finish. - On-Site ADAS Calibration:
Since most safety sensors are located behind the exterior panels, the shop should have the specialized targets and lighting required to recalibrate your cameras and radar.
Evaluating Structural Integrity and Mechanical Health
Once the vehicle is inside the facility, the focus shifts from the exterior “skin” to the internal mechanical systems. An accident rarely affects only the body panels; the kinetic energy from an impact can travel through the frame and affect the suspension, wheel hubs, or even the drivetrain. This is why a thorough collision repair often requires a multi-disciplinary approach. While the body technicians work on the frame, a specialized technician should be performing a full diagnostic scan of the vehicle’s “nervous system” to identify any electronic faults or sensor misalignments that aren’t immediately visible.
In many cases, the physical impact can cause minor leaks in the cooling system or subtle shifts in the wheel alignment that won’t be apparent until you are back on the highway. A reputable facility will often coordinate with a local auto repair shop to perform a secondary mechanical inspection after the structural work is complete. This “double-check” ensures that your vehicle doesn’t just look straight, but that it tracks perfectly on the road and that all fluid pressures are within normal operating ranges. This holistic view of the vehicle’s health is what separates a standard fix from a professional restoration.
Consider these “hidden” mechanical checkpoints during the teardown:
- Wire Harness Inspections:
Impact energy can pinch or fray wires hidden inside the door or fender, leading to intermittent electrical ghosts months later. - Fluid Line Integrity:
Even if there is no puddle on the ground, high-pressure lines for the AC or transmission may have been stressed or cracked during the collision. - Mounting Point Stress:
The bolts and brackets that hold your engine and transmission in place are designed to absorb energy; they must be inspected for hairline fractures. - Exhaust System Alignment:
A rear-end collision can push the exhaust pipes forward, putting dangerous stress on the engine manifold.
Restoring Safety Barriers and Optical Clarity
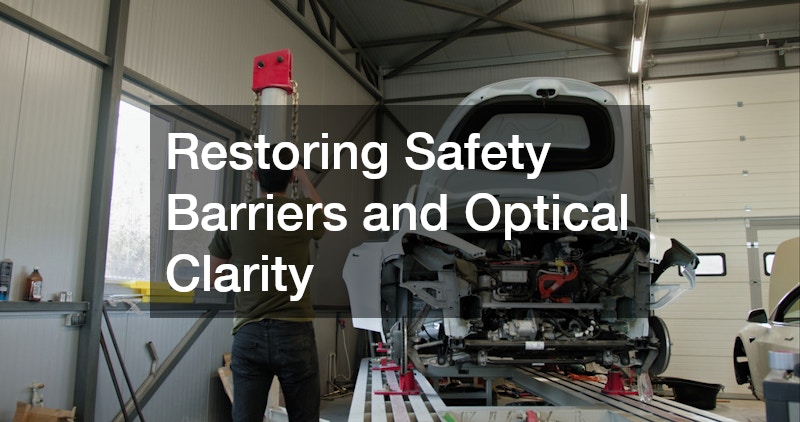
The “face” of your vehicle, including the grilles, headlights, and bumpers serves as the primary housing for your car’s most advanced safety technology. Most people think of a bumper as a simple plastic cover, but in 2026, it is a sophisticated housing for ultrasound and radar units. Because of this, bumper repairs have become an exercise in precision engineering. If a technician uses too much filler or the wrong type of plastic welding, the thickness of the repair could actually “blind” the blind-spot monitors or adaptive cruise control sensors located behind the panel.
Optical clarity is the other half of the safety equation. Your windshield is not just a piece of glass; it is a structural component that contributes up to 30% of the cabin’s strength in a rollover. Furthermore, the forward-facing cameras that control your lane-keep assist and emergency braking are mounted directly to the glass. If your windshield was chipped or cracked during the accident, an immediate auto glass repair or replacement is non-negotiable. The new glass must be perfectly clear and free of distortion to ensure the car’s “eyes” are seeing the road exactly as it is, without the digital artifacts that a low-quality replacement might cause.
Prioritize these safety-centric repairs to ensure your car’s “eyes” remain sharp:
- Calibration Verification:
Always ask for a printed report showing that the cameras and radar have been successfully “zeroed out” after the glass or bumper work. - Headlight Aiming:Even a small shift in the mounting bracket can cause your high-beams to blind oncoming traffic or leave you with a dark spot in your field of vision.
- OEM Glass Selection:
For cars with Head-Up Displays (HUD), using generic glass can cause the image to appear blurry or “ghosted.” - Urethane Curing Times:
Ensure the shop follows the strict “safe drive-away time” for the glass adhesive, which can take several hours to fully cure to its structural strength.
Mastering Surface Preparation and Paint Matching
The most visible part of any auto damage repair is the paint. Achieving a factory-perfect match on a three-year-old car is an art form. Factors like UV exposure, road salt, and even the mineral content of the water used to wash the car can subtly shift the color of the original panels. Professional painters use spectrophotometers digital cameras that analyze the light reflection of your paint to create a custom formula that blends perfectly with the existing finish. This prevents the “patchwork” look where the door appears a slightly different shade than the fender under direct sunlight.
Once the paint is perfectly matched and applied, the focus turns to protection. Freshly painted panels are at their most vulnerable during the first few weeks after they leave the spray booth. To prevent road debris from immediately ruining the new finish, many high-end owners choose to have paint protection films applied to the leading edges of the car. These “clear bras” are made of self-healing urethane that can absorb the impact of gravel or rocks, ensuring that the work you just paid for remains pristine for the life of the vehicle.
To ensure your paint job lasts for the next decade, follow these curing protocols:
- The “Hand-Wash” Period:
Avoid automatic car washes for at least 60 to 90 days after the paint is applied to allow the solvents to fully outgas. - Avoid Waxing Immediately:
Do not apply traditional paste wax to fresh paint for the first two months, as it can “seal” the paint before it has fully hardened. - Uniform Texture:
Inspect the “orange peel” or the slight texture of the paint; it should perfectly match the texture on the undamaged panels of your car. - Edge Wrapping:
When applying protective films, ensure the technician “wraps the edges” so there are no visible seams where dirt can accumulate.
Optimizing Aesthetics and Interior Comfort Post-Fix
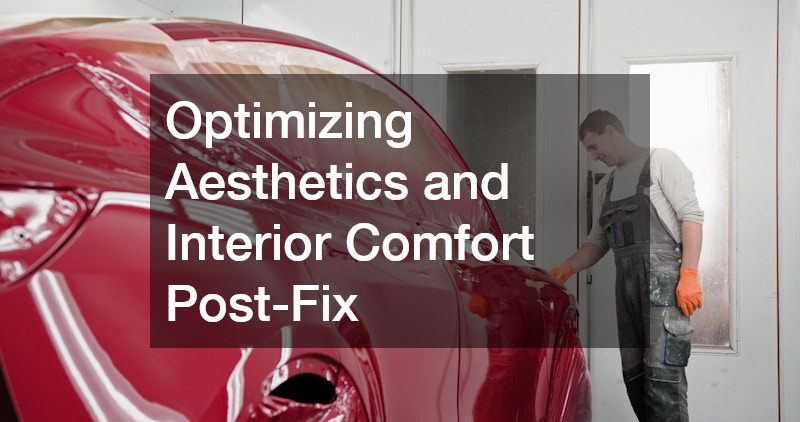
The final phase of a professional restoration is what makes the car feel truly “yours” again. After weeks of being in a dusty shop environment, the vehicle needs a thorough decontamination. This is the ideal time to add the “finishing touches” that enhance the driving experience. For example, applying a professional-grade ceramic coating over the newly cured paint and the rest of the body creates a hydrophobic barrier that makes future cleaning effortless and provides a deep, liquid-like gloss. It acts as a permanent shield against bird droppings, tree sap, and acid rain.
Furthermore, consider the interior environment. If your windows were damaged or if you just want to upgrade your cabin’s thermal management, high-performance car window tinting is an excellent post-repair addition. In 2026, ceramic-based tints can block up to 99% of infrared heat without interfering with your cell signal or GPS. This protects your leather or fabric interior from fading and makes the cabin much more comfortable during the summer months. When you finally take delivery of your vehicle, it shouldn’t just look like it was repaired; it should look like it was detailed by a world-class team.
Use this final walk-through checklist before you drive off the lot:
- Light Inspection:
Check the paint under both direct sunlight and fluorescent “shop lights” to ensure there are no swirls or color mismatches. - Electronic Function:
Test every single button, from the seat heaters to the sunroof, to ensure no fuses were blown during the repair. - Seal Integrity:
Listen for any new wind whistles or water leaks by taking the car through a high-pressure touchless wash. - Odor Neutralization:
Ensure the “shop smell” has been replaced with a clean, neutral scent through the use of an ozone generator or deep interior steam cleaning.
Conclusion: Reclaiming Your Confidence on the Road

The road back from a collision is rarely a straight line. It is a process of small, technical victories that eventually add up to a vehicle you can trust with your family’s safety. By understanding the complexity of the modern repair environment, you move from being a passive observer to an informed advocate for your own property. The goal of a professional restoration is not just to fix the visible damage, but to restore the “soul” of the machine, the precise alignment, the silent cabin, and the responsive safety systems that made you fall in love with the car in the first place.
As you move forward, keep a detailed file of all the digital scans, part invoices, and calibration reports generated during the fix. This documentation is your proof of quality, protecting your resale value and providing a clear history for the next owner. While you can’t undo the accident, you can control the quality of the recovery. By demanding the highest standards of craftsmanship and technological precision, you ensure that your vehicle remains a reliable, beautiful, and safe partner for every mile that lies ahead.